
This post may contain affiliate links.

Last December I decided THIS was going to be the year I finally built my garden. I purchased my home five years ago, knowing exactly where I would put in beds, daydreaming of the fruits and veggies I would undoubtedly be growing, and it never happened. Life always got in the way. I had years of revolving roommates, 6 AM to 10 PM work days (for a salary job!), and then marriage, pregnancy from hell, followed by a preemie, and suddenly becoming a stay at home mom. Needless to say, a garden was always on the back burner.
I knew that this would be the year I would do it, unfortunately given our circumstances, I also knew that this would be the year I had no money to do it, so I was going to have to be resourceful. I gave myself a budget of $150 and got started researching. I broke down a lot of steps in my post for Herbs 101: Starting a Budget Friendly Herb Garden in 6 Affordable Steps! so I recommend reading that one next for some invaluable frugal tips for starting a garden!
But now I will walk you through my process, sharing how and why I made the choices I did, how much each step cost me and some great free or cheap alternatives to make it work for you!
[RELATED: 30 Fun Spring Activities for Singles, Couples and Families + FREE Spring Bucket List Printable!]
Gardening Method – $0
The first step was figuring how I wanted to grow because it would change what I grew. After researching, I decided on a square foot garden, in a raised bed only because our yard floods (this is an important note, I’ll explain why later)! The idea of a square foot garden is to plant things utilizing a square foot in the bed, as opposed to a row to maximize the space and efficiency. If you’re interested in learning more about the square foot method to see if its right for you, you can learn more at Square Foot Gardening.
There are tons of ways to plant a garden, and your situation may require something different than me, its important to read about all the ways to garden to see what will be most effective for you! Some methods cost more than others so always keep that in mind as you start the planning process!
The Seeds – ~$25
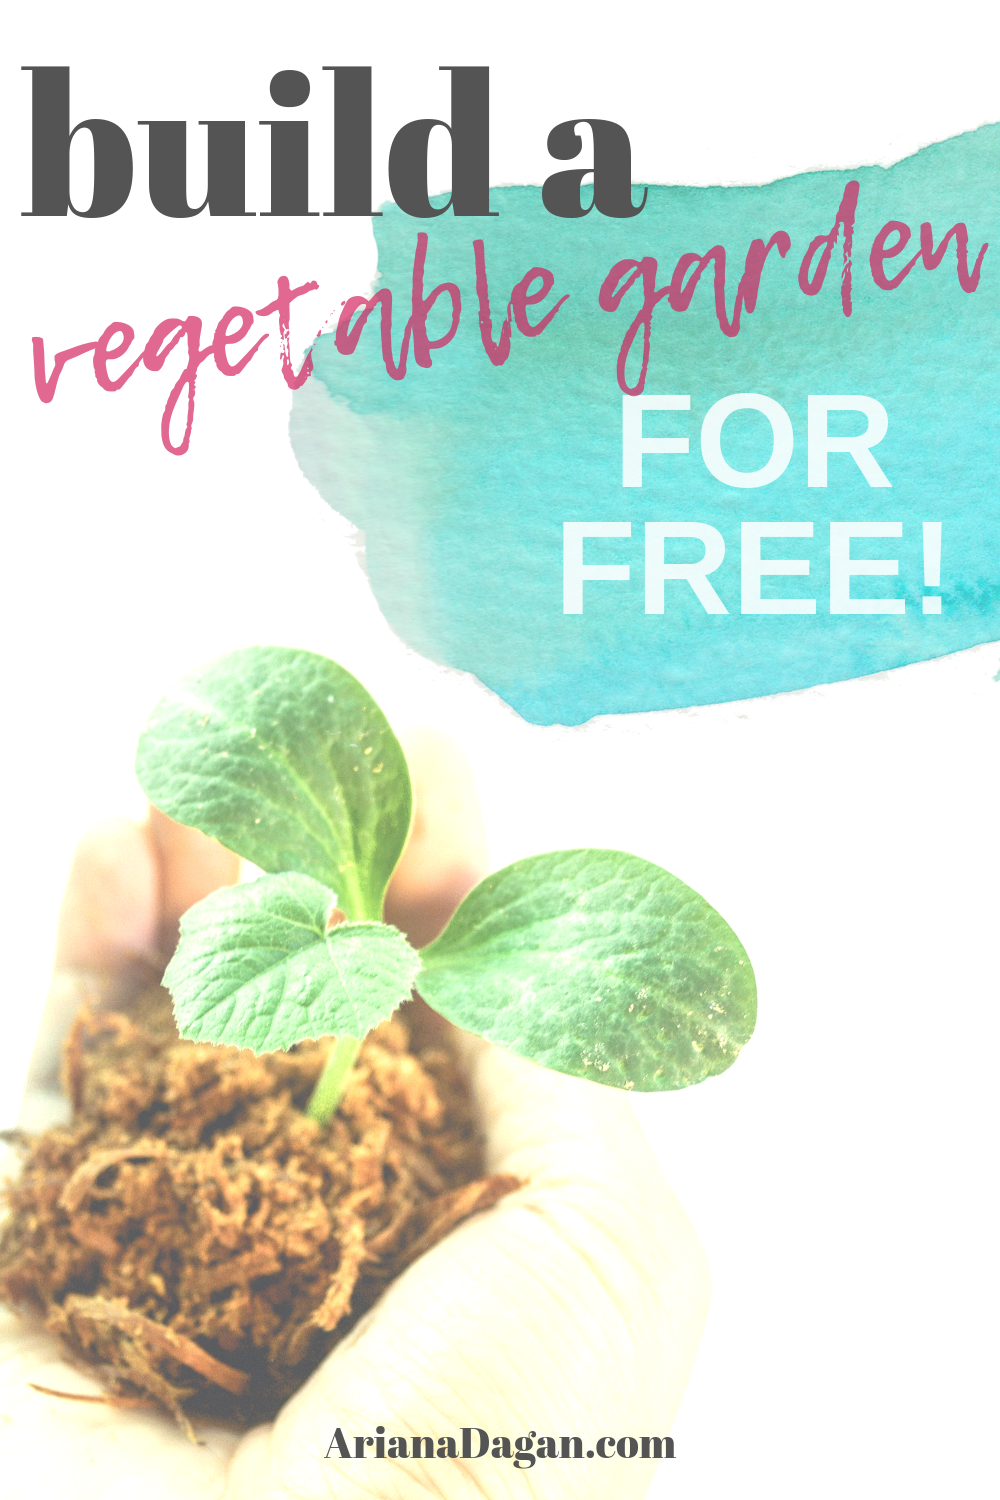
Once I understood my method, I needed seeds. I looked through my cupboards, freezer and fridge and listed every fruit and veggie I could find. I narrowed the list down by removing things such as trees, items I wanted to grow in containers, or just wouldn’t be great in my hardiness zone. That left me with 21 plants (plus some herbs). (Yikes!) I researched different websites, looking at reviews for germination and taste, and compared prices of course. I finally decided on MiGardener.com. I am not an affiliate, but I have had tremendous success with my seeds so far, so I am a happy customer!
The next thing is to figure how many seeds you need. On my list I made two very important notes next to each plant.
- How many seeds fit into a square foot
- How many plants feed a single person for the year
With this information, I was able to determine how many seeds I needed of each. I used the number of plants to feed a single person x3 (for my household). That number compared to the number of seeds that fit into a square foot, would determine how many square feet I needed for that plant.
For even cheaper options for seeds try some of these tips:
- Do seed trades: If you buy a pack with 100 seeds and you only need 10, you have 90 seeds you can trade for others! Join local gardening groups, or neighborhood groups to find out if a swap is going on around you, or to start your own!
- Many plants can be replanted directly from the plant. Google your plants to see if something you just bought at the grocery store could be used to plant!
[RELATED: Seasonal Printables]
For example: Broccoli is 1 plant per square foot, and 2 plants per person. So 2 plants x3 people = 6 plants needed, at 1 per square foot, I need 6 square feet total for broccoli.
I adjusted up and down for foods we eat a lot, versus ones we eat less often. But this is how I figured out my numbers for seeds. I ordered my packages, and the cost was less than $25 (including shipping)!
Mapping the Garden – $0
The next step is to map your garden. Personally I got this done before purchasing the seeds, but it wouldn’t have change (my) outcome if I hadn’t. I made copious notes about companion planting, and using my square foot numbers I played around with dozens of combinations to see what plants would grow best together.
While doing so I measured my yard to figure out how best to utilize the space. I decided on a layout of 4 beds measuring 3’x6′ for a total of 72 Square Feet. This would maximize the length of my yard, while not taking up much space into it. Placement would allow me to get around the beds and easily reach all the way over when needed. I used the Free Garden Planner App on Gardeners.com to lay it out, but you could also:
- A quick google search will you give you dozens of websites with suggested layouts you could use
- A search in your app store will give you apps with garden planners and access to communities to ask questions!
- Search facebook groups for local gardeners to find out what works well for them in your hardiness zone
- Use a good ole pencil and paper to make notes and scribbles until you find a layout that works for you!
Prepping Seeds – $0
Once I received my seeds, I needed to prep them. You can read all about this process and some additional frugal options on my Herbs 101: Starting a Budget Friendly Herb Garden in 6 Affordable Steps! post, but here is what I did:

- All seeds that needed to be grown inside prior to planting, I soaked for 24 hours. I used a muffin tin (each cup was marked with tape to indicate what the seeds were), filled with hot water and dropped the number of seeds required in (plus a couple extra in case they didn’t germinate).
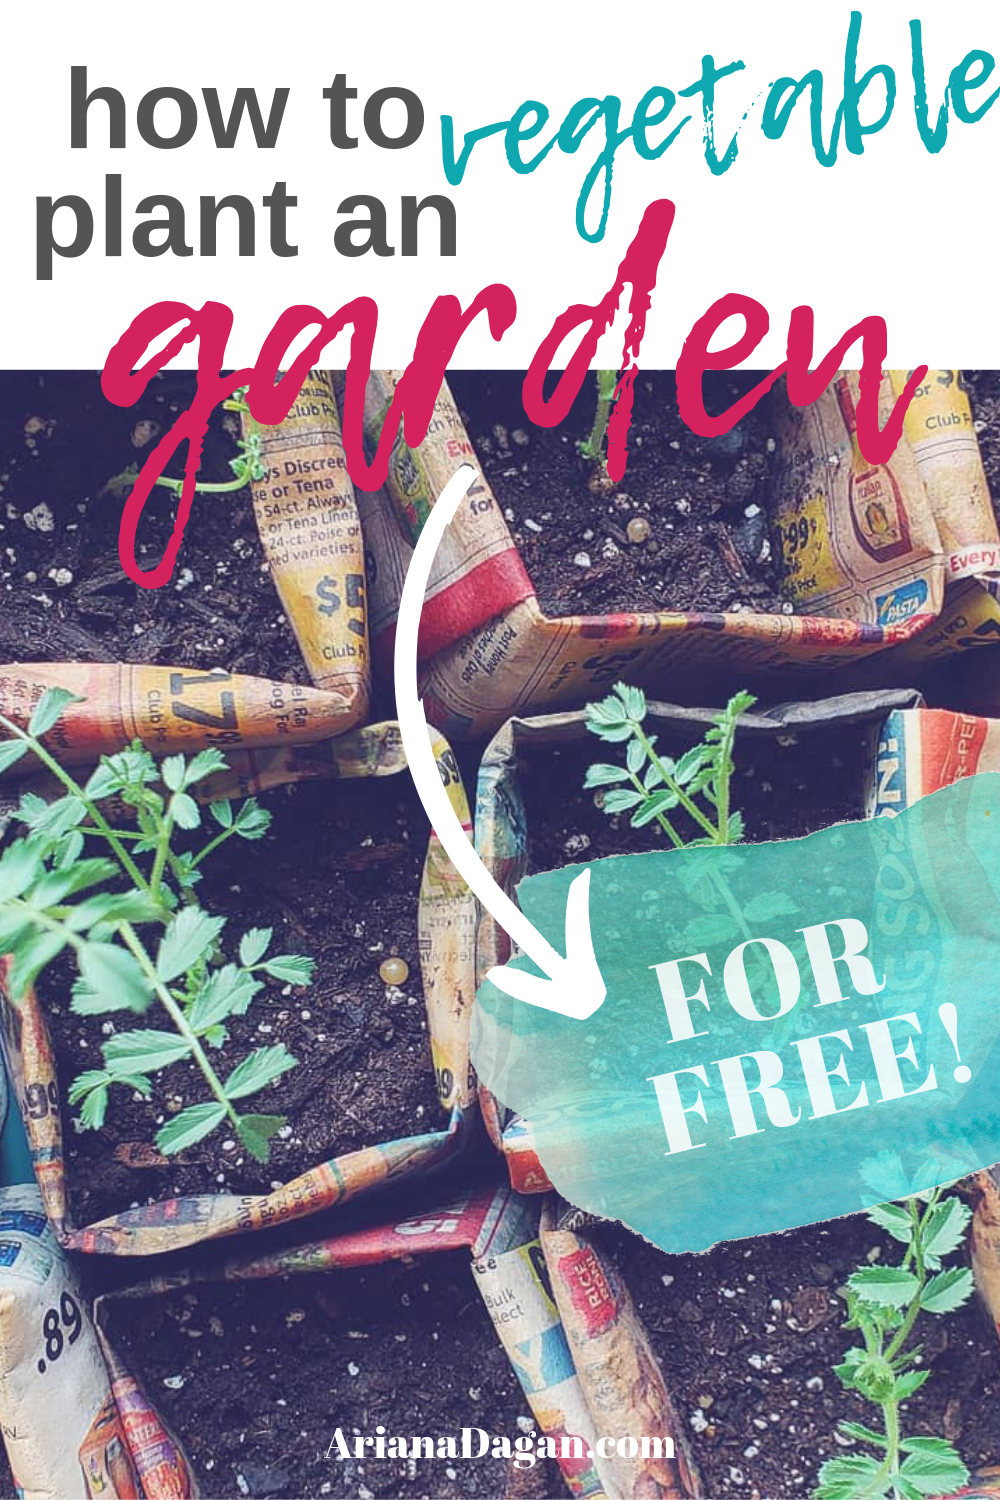
- After the 24 hours were up, I built mini boxes using newspaper, filled with soil from my yard. I watered the soil, then planted my seeds as indicated on their packages.
- I placed the seed boxes in a south facing window, supplemented with a growing light.
- For seeds that are planted directly outside, I soaked 24 hours prior to planting.
[RELATED: Free Printable Spring Word Search + 4 Prizes Kids Will LOVE]
Building The Beds -$0
The important thing for this post is understanding my situation. Our backyard fence had fallen over during the winter storms, our priority is getting it replaced but as cheaply as possible. It consists of 6′ tall pickets, 5.5″ wide, .5″ thick. Dozens of pieces had broken, snapped, rotted and just generally fallen over. Because of this, I had access to tons of wood.
More-so, I couldn’t actually get to my fence because part of it was blocked by some overgrown dead trees. In order for us to fix the fence, I had to remove the trees which left us huge piles of branches and trunks as well. So here is what I did to utilize both:
- I pulled out the thickest branches and trunks from the bunch and cut the straightest parts in into 15″ long posts.
- Then I measured out my bed placement, hammering the posts into the ground approximately 3″ deep. I placed them at each corner of the bed, 1 between the 3′ sides (1.5′ interval), and 2 between the 6′ sides (2′ intervals).
- Taking the 6′ pickets, I laid them down sideways, screwing them into each post. I used two full pieces for each 6′ side, and 1 cut in half for each 3′ side.
- Full disclosure: My pieces are NOT pretty! Besides being broken, rotted, and paint chipping off, I rarely had FULL pieces. I often had to patchwork shorter pieces together to build a side. But it WORKED and was FREE!
And whola! Your beds are built! Now if you don’t have access to free fencing pickets as I did, here’s what you CAN do:
- Post on craigslist or your local garage sale group and ask if anyone has pulled down a fence and if you could take their wood! I promise you, they would rather give it to you than pay to bring it to the dump so its worth asking!
- If you know you want to do something like this, you can start collecting. Asking around, collecting your own pieces as they fall apart, etc.
- As your friends and family if they have any wood lying around they could part with.
- If the above doesn’t work, you can buy your own cedar pickets at your local hardware store for less than $2 a piece. At 6 pieces per bed, that’s less than $12! If you buy posts it will cost more, but still pretty affordable!
[RELATED: Herbs 101: Harvesting and Preserving + FREE Quick Reference Printable!]
Filling The Beds -$0
Prior to starting the build, I began saving cardboard boxes that came in the mail. I only saved ones that were natural brown with minimal to no ink (picture the amazon boxes). If you do have boxes with colors or the shiny paper over it, you can rip that layer off to use it!
The bottom layer of my beds were cardboard. I laid it down right over weeds and grass. No digging, no spraying required. The cardboard acts as a natural weed barrier and moisture retainer without risking mold.
TIP: If you don’t have access to cardboard, you can ask around, or visit your local cardboard drop off area and take some for free!
The next layer was tree branches. I cut up the branches and laid them down making it as thick as I could to provide a good layer. The branches offer a natural drainage, while also acting as a compost. As the branches break down, they release nutrients such as nitrogen into the soil to boost your plants! They also act as a great barrier from slugs and snails because they make it so hard to get through!
TIP: Again, if you don’t have immediate access to branches, ask around if anyone is doing some tree trimming and if you could grab them! Another option is going on a walk in an area with trees, like a park. There are usually plenty of broken branches on the ground you could grab and use for free!
The last item to fill the bed is dirt. Another situation we encountered this winter was flooding. Excessive amounts. And our original plan to plant directly into the ground was shattered when we realized the flooding would destroy a garden. Because of this we had no option other than building a raised bed, but after our fence gets fixed, the next item on our to do list is to fix the flooding issue by putting in a french drain. Because I will need to dig a trench through our whole yard, it also means I will need to put said dirt somewhere else.
This provided the perfect solution to my half empty beds! I dug a trench, and put the dirt directly into the raised beds. Is it the best quality dirt? Nope. Will I make do? Yup. Plus I killed two birds with one stone by digging the trench and getting free dirt.
[RELATED: Hello Spring! FREE Printable Garden Cards!]
Now, if you aren’t in the same position I am in (count yourself lucky), and once again, look to your neighbors:
- As neighbors, friends, family, craigslist etc. if anyone has dirt they need removed. To sound the obvious alarms, you have no idea whats in this dirt, there may be glass, weeds, plastic, etc. So proceed with caution. But you’ll get free dirt.
- You can also keep an eye out for people trying to get rid of extra potting soil when they purchased too much. It’s rare, but it does happen and you can get a crazy good deal when it does!
- You can make your own potting soil by adding peat moss and sand to your dirt! It will cost a little depending on how much you need, but cheaper than buying the potting soil outright!
- If you have to buy potting soil, go to a farm or garden supply store rather than the big name stores where you have to buy bags. Buying it by the truckload is WAY cheaper and usually much better quality. Check your local dump as well!
I mixed the top of my dirt off with compost. I started a compost pile last year, so there’s not a ton of dirt from it, but I was able to at least mix the top layer of dirt with fresh compost!
- If you haven’t started your compost pile yet, do it! It will take some time to make dirt, but start now, add often, and by next year you will have something to work with!
- If you live near a farm, they often sell well matured manure for cheap truckloads which make incredible soil additives!
- If you have to buy an additive, go to a farm or garden supply store to get better quality at a far better price!

Finally, after planting, I topped off my dirt with mulch. I once again looked to my hard, this time using the grass clippings after a fresh mow. They are FREE and a great way to lock in moisture, protect your dirt, and provide a cover that will break down adding nutrients to your plants! NOTE: I do not add these right away, I put into a pile and let die before adding. If you don’t have grass clippings at your disposal:
- While compost is not considered a mulch, it does act the same way and provide the same benefits without risking stealing nutrients from your plants.
- Tree trimmings can be chipped to create an amazing mulch. If you know someone with a chipper, this is a super cheap way to go. If not you could rent one or look for a local program that chips tree trimmings. I’ve seen it anywhere from $15 to $100 for someone to come out, but depending on how many branches you have, this could be an inexpensive way to go!
- Rake up your leaves after they’ve fallen, and run them over with a mower to get them smaller. Perfect free mulch!
- Buddy up to people in your local neighborhood groups that may have extra mulch they want to get rid of!
So there you have it, my $25 vegetable garden, and tips for you to do the same! Any other tips you’d add to this list? Drop a comment below!
[RELATED: Herbs 101: Starting a Budget Friendly Herb Garden in 6 Affordable Steps!]


SHOP LINKS | NEWSLETTER | PINTEREST | LINK PARTIES | FREEBIES